Management Skill #2:
Running Reports in CleanSuite |
Watch the video above for step by step directions. If you need the video to be displayed larger, simply click on the box to the right of the youtube icon on the video above. Doing so will make your video full screen. To exit full screen and return to this page, press the Esc key.
Filters: When you first look at the list of filters (in the pink area), you may be a little overwhelmed. What are they and how do you use them? The best way to find out is to try them. Pick or change a filter and press F12 to see the results. You'll find most of them are fairly obvious; if you're not sure, call CleanSuite for help.
Selected Filters: As you add filters to create a report, they are displayed in the grey "Selected Filters" area. Removing Filters: To remove a filter, highlight it in the "Selected Filters" list and click on this button. Note: The date filter cannot be deleted. E-mail Reports: In addition to printing a report you can e-mail reports. This is useful if you wish to send the receipt report to a head office, a partner or your accountant. Or perhaps you want to send your time cards to someone that looks after payroll. After checking E-mail report click on Print F3 to print a copy of the report and send it by e-mail. Click on Display F12 to display the report before e-mailing it. 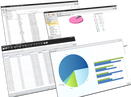
|
Tips for Running Reports
Sorting:
Click on this to select the order you want the items to be listed in.
Picking a printer:
First, select the printer you use to print your reports. Next select Standard or Thermal. This option is available only for the receipt reports. It allows you to print reports on a thermal printer or a standard ink jet, laser or dot matrix printer. Finally, select the number of copies you want printed.
Printing:
F3 Click on this or press F3 to print the report. To print part of a report, press the F12 key to display the report and decide which pages you wish to print. Press F3 and specify which pages you wish to print. Exporting:
All of the reports can be exported to files which can be read by other programs, such as Excel. To set this up, specify the folder you want the "exported" report files saved to, name the file and select the format of the file you wish to create, ie: Excel or Word. For more on this see Report export.
Save As:
F5 This saves a report with any changes you've made. You can save it with the same name or create a new report that you can use again.
Delete Report: If you want to delete a report, click on this button.
Note: You cannot delete the Standard reports.
Display Option:
F12 Click on this button or press F12 to display the report on the screen. Press the Page Down key to "page" though the report. Press Esc to return without printing. Press F3 to select and print all pages or a range of pages.
Close:
Esc When you're finished with a report, press F5 if you wish to save any changes you may have made, then click on the Close button or press Esc to return to the Command Line.
Employees Use:
Designate which employees are authorized to run or modify the report within the Employee File screen.
Tip: Even as manager, you may want to designate yourself as only being authorized to run reports. This way, once you're happy with the way a report runs, you can just have it print out, without the report screen always popping up. (Anytime you need to modify the report, you can temporarily change your authorization in the Employee screen.)